Manjaro is a Linux distribution that debuted in 2011 and has been rising in popularity ever since. It’s based on Arch Linux, which is generally thought of as a powerful distro built for Linux experts. Manjaro harnesses the power of Arch but presents it in a user-friendly package.
What Makes Manjaro a Good Distro?
There are so many Linux distributions to choose from, so you might be wondering why you should choose Manjaro.
Manjaro is simple to set up and easy to use. It’s the ideal distribution for users that want a lot of control over their system, but don’t want dig deep into the terminal to apply all their customizations.
In short words, Manjaro is a user-friendly version of Arch Linux.
Manjaro adheres to a rolling release schedule, meaning that you can always upgrade to the latest release very easily. All you need to do is use the pacman package manager to stay up to date, or the software upgrade application available in GUI. This way, you’ll always have the latest version of Manjaro and access to the most bleeding edge technology.
Download Manjaro Linux
There are a few different editions of Manjaro available. The only difference between each of them is the desktop environment that comes installed. And, as you may know, different desktop environments also come with their own applications and programs.
The three official editions of Manjaro come with either XFCE, KDE Plasma, or the GNOME desktop environment. If you don’t have much preference on which one to use, XFCE is listed at the top of the Manjaro download page and seems to be the most popular edition. But really, you can use any of these three graphical interfaces and still get the full Manjaro experience.
Visit the Manjaro download page to grab an ISO copy of whichever edition you want. Or, you can browse directly to the XFCE, KDE Plasma, or >GNOME download pages.
Manjaro also has community-driven editions available that feature more desktop environments like Budgie, Cinnamon, Deepin, I3, MATE, and Sway.
Whatever your preference may be, make your selection and download the ISO file you want to use. Then, make a bootable USB flash drive with a program like Rufus. Or, if you’re installing it in a virtual machine (such as VirtualBox or VMware), you’re ready to go as soon as the ISO file finishes downloading.
Install Manjaro Linux
These instructions will run through the process of installing Manjaro on a physical computer or virtual machine. In the following steps, we’re using the XFCE edition of Manjaro. You will be able to follow along with us regardless of what Manjaro edition you’ve chosen.
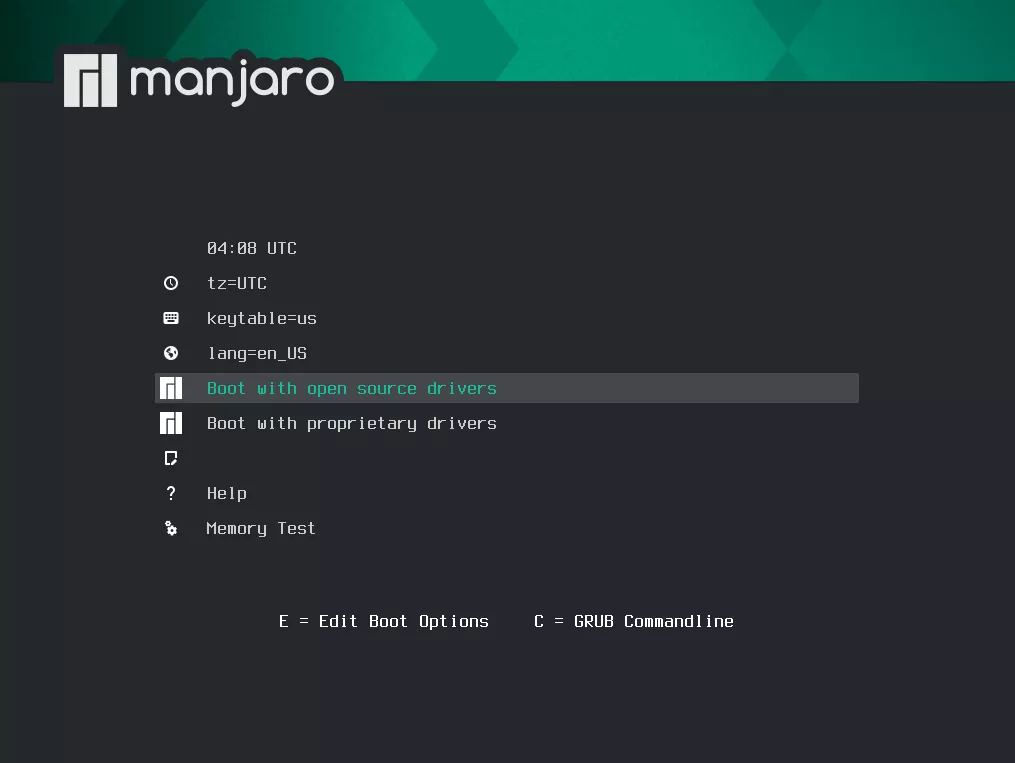
Step 1. Once you have inserted your boot media into the physical computer or virtual machine, select the option to boot with open source drivers. If you experience problems throughout the installation, you can try restarting and booting with propriety drivers instead.
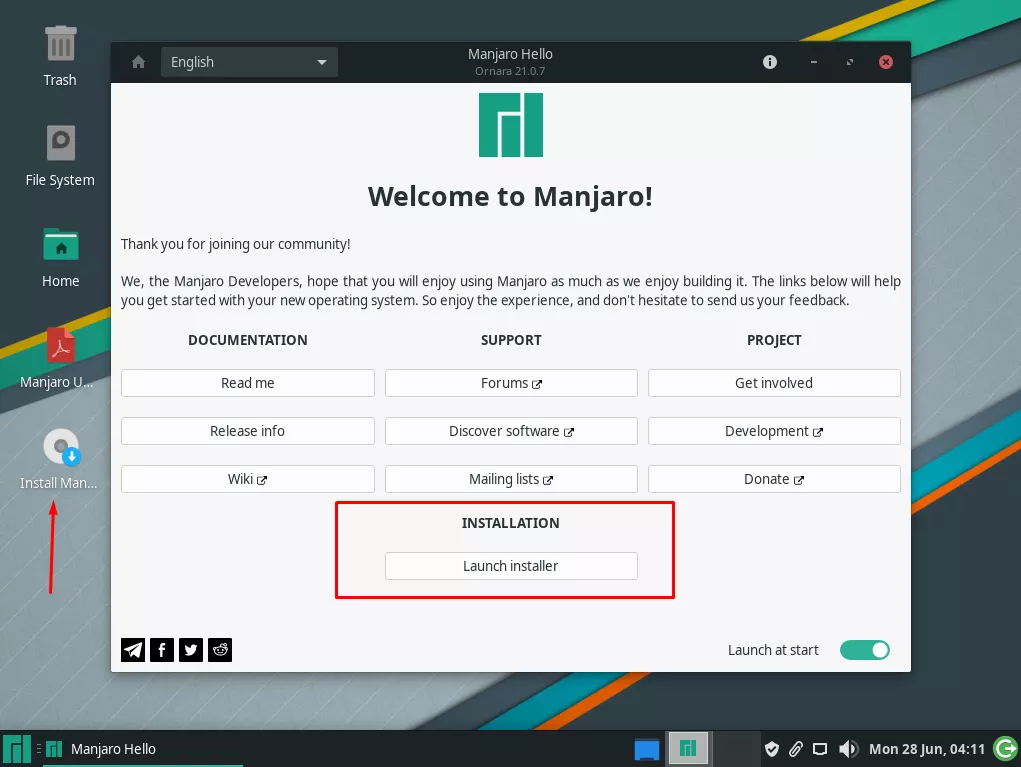
Step 2. Choose the “Launch Installer” option. If you don’t see it, you can open the shortcut on the desktop to launch it.
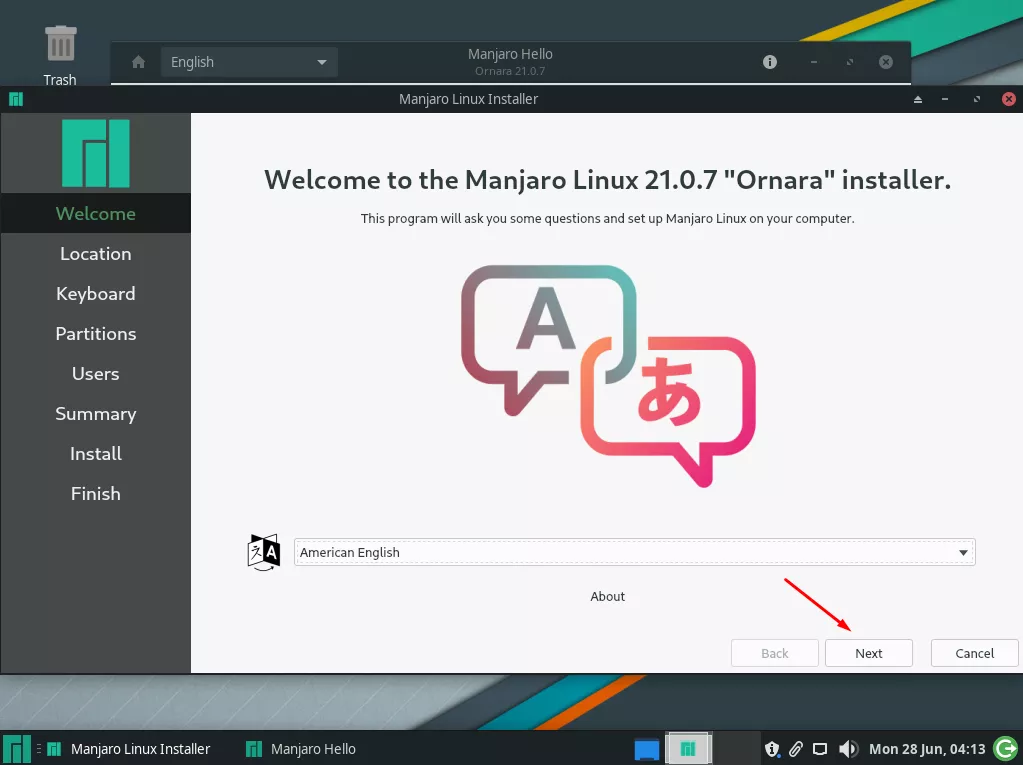
Step 3. Select your preferred language and click “Next.”
Step 4. Select your time zone and click “Next.”
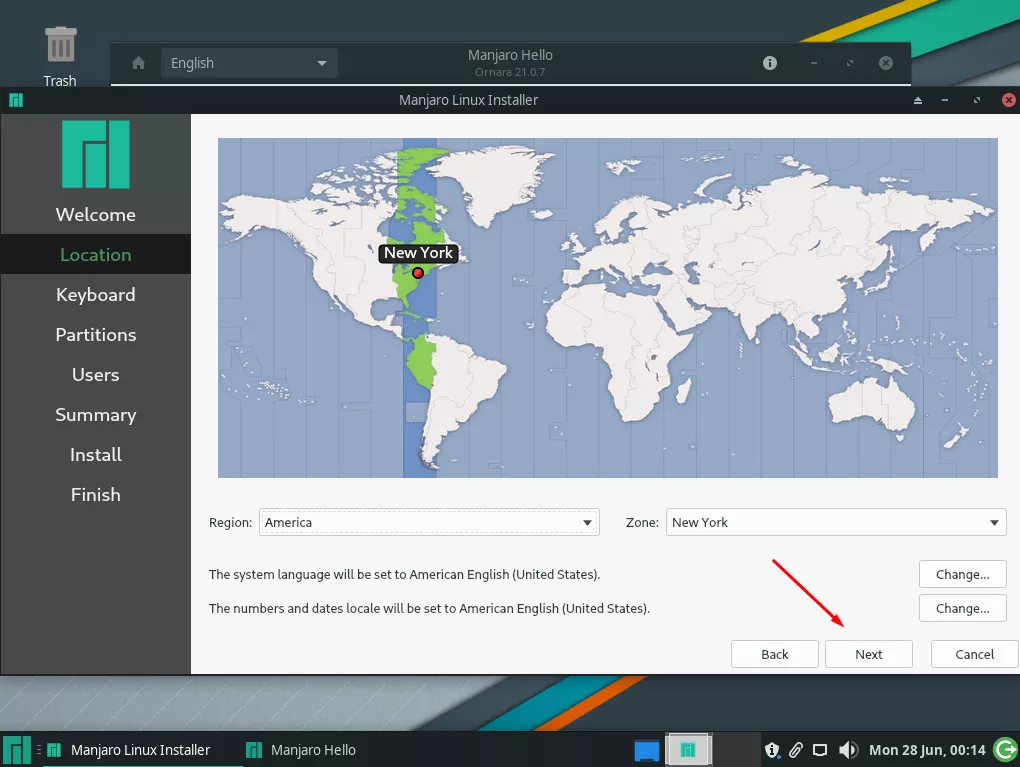
Step 5. Select your keyboard layout and click “Next.”
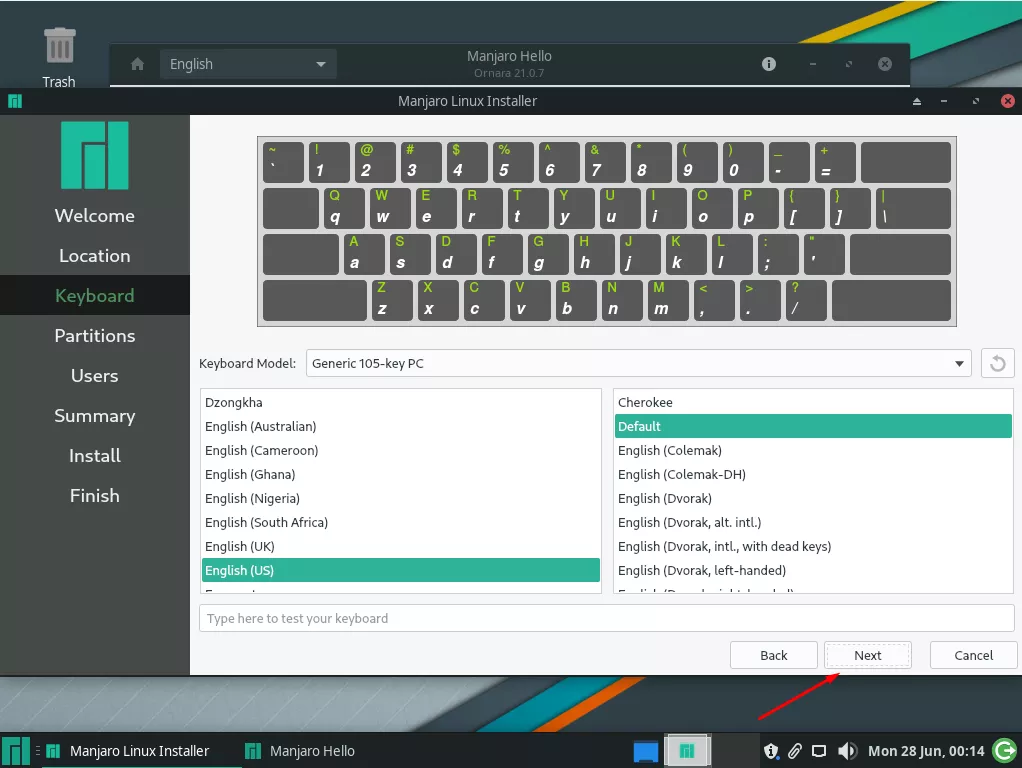
Step 6. You now have two options. You can either let Manjaro partition your disk automatically (with or without swap), or choose to manually configure the partitions. It’s generally fine to let Manjaro do the configuration for us, but we recommend selecting the option to add swap space. If your disk already contains other partitions (that you wish to keep), or you have some custom configuration in mind, then choose manual partitioning.
Note that this page also contains the option to encrypt your system. Choosing this option means that you’ll be prompted for a password upon every boot, which then allows the system to mount your encrypted root partition. If your computer is lost or stolen, no one will be able to access your files without the password. Encryping your system is purely optional, so make your decision before proceeding to the next prompt.
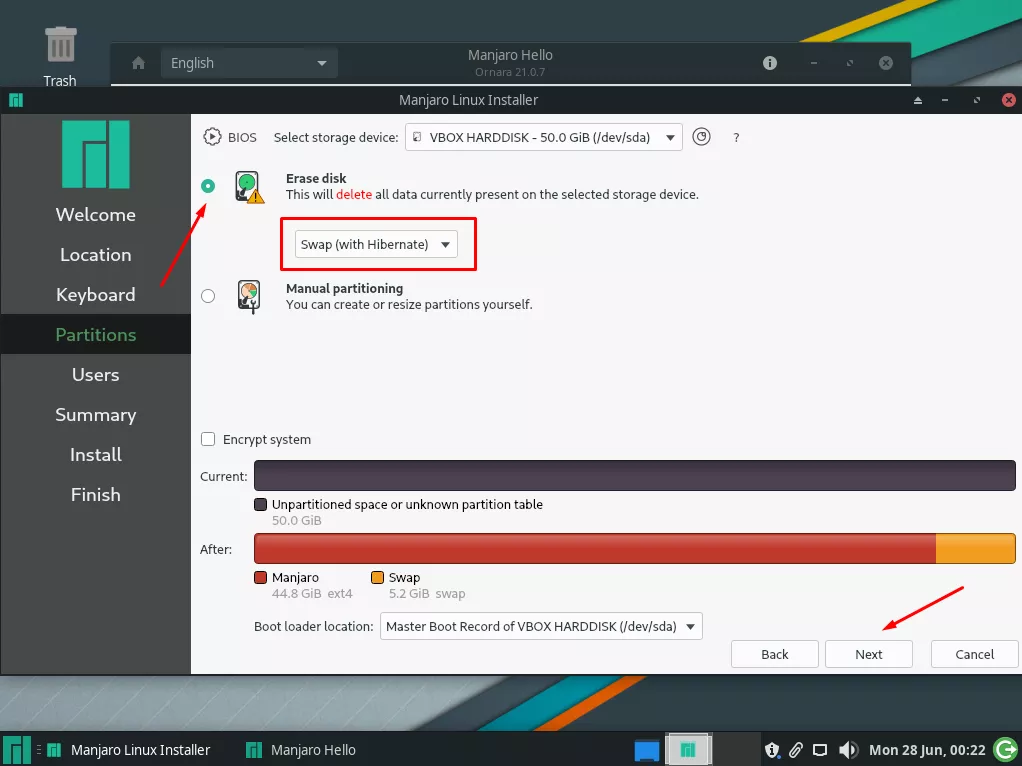
Step 7. Fill out your desired username and computer name. Optionally, you may select to login automatically (without password) and let the administrator (root) account use the same password as your user.
Step 8. The installer now gives us one last chance to review the settings we’ve filled out. Click “Install” if you’re sure everything looks okay. Then, this configuration will be written to the disk.
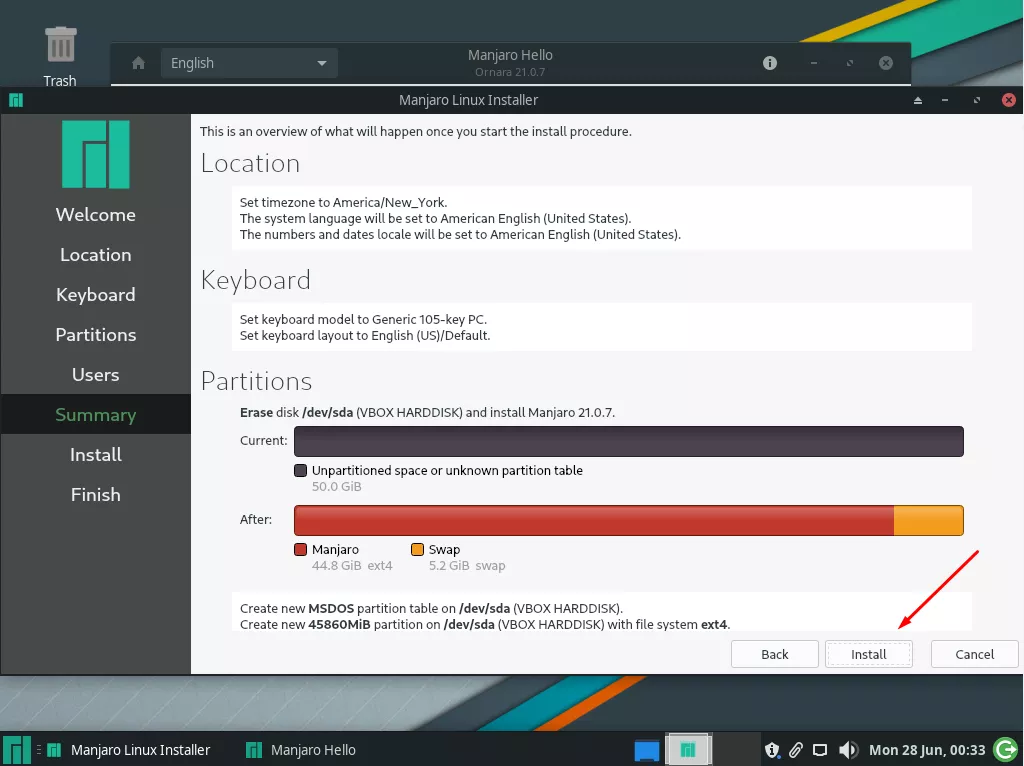
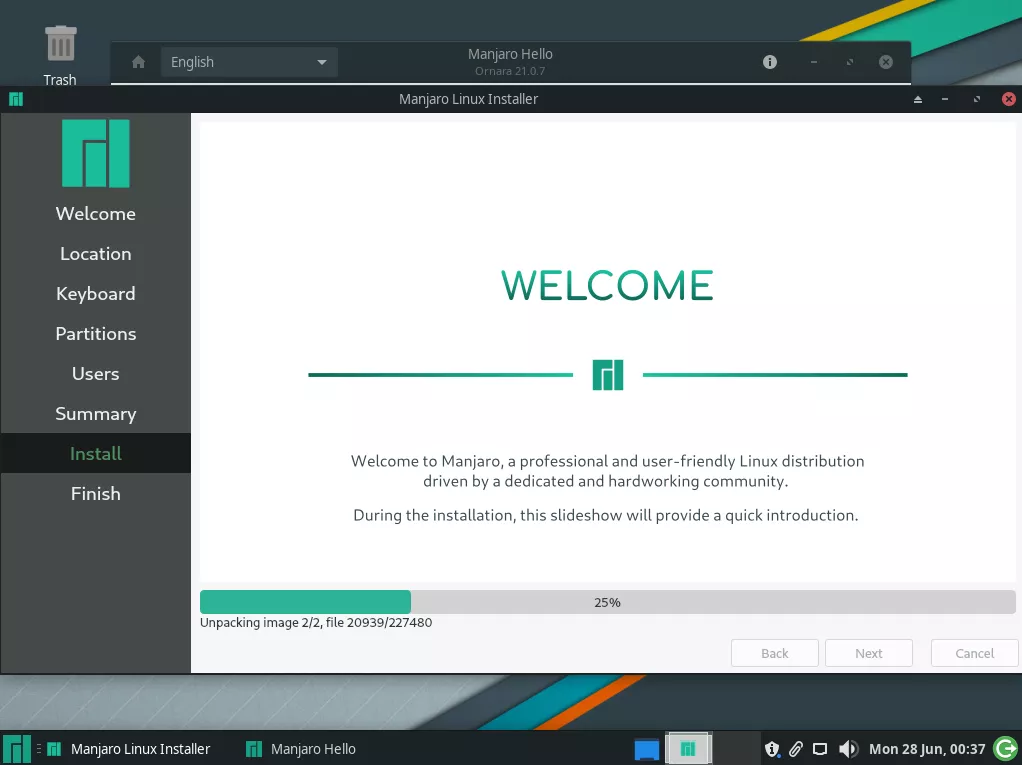
Step 9. Now for the boring part. Manjaro will now be installed to disk, which will take at least a few minutes.
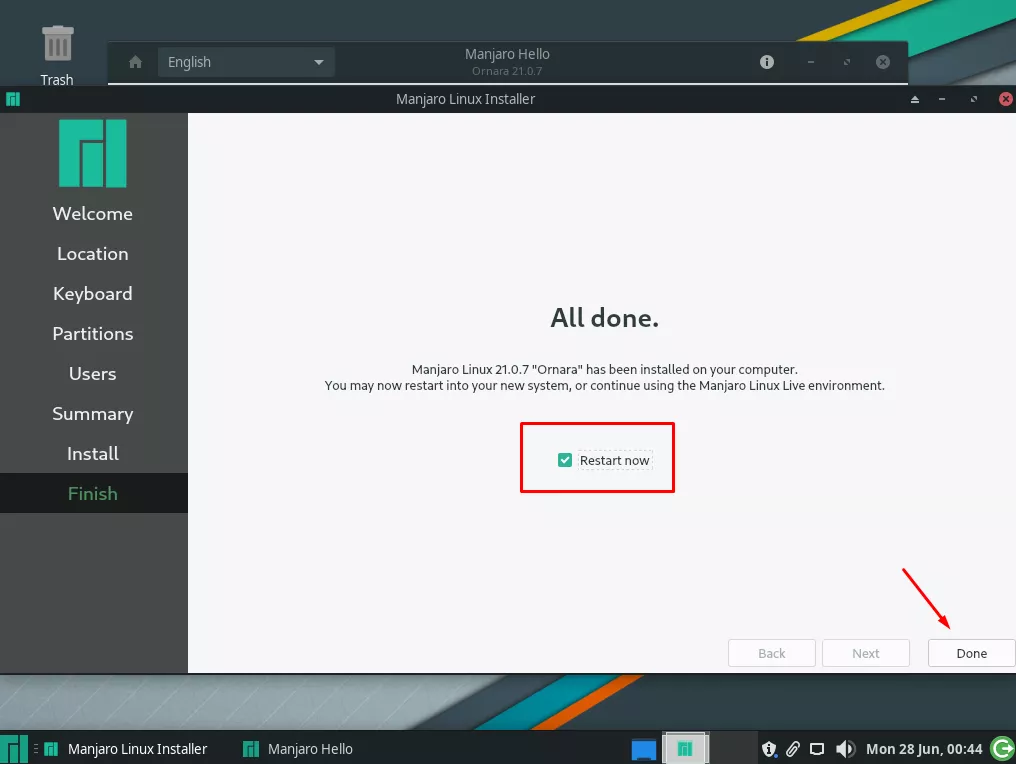
Step 10. Once installation wraps up, choose the option to restart your system. Be sure to remove the installation media at this time, so you don’t boot right back into the live environment.
Wrapping Up
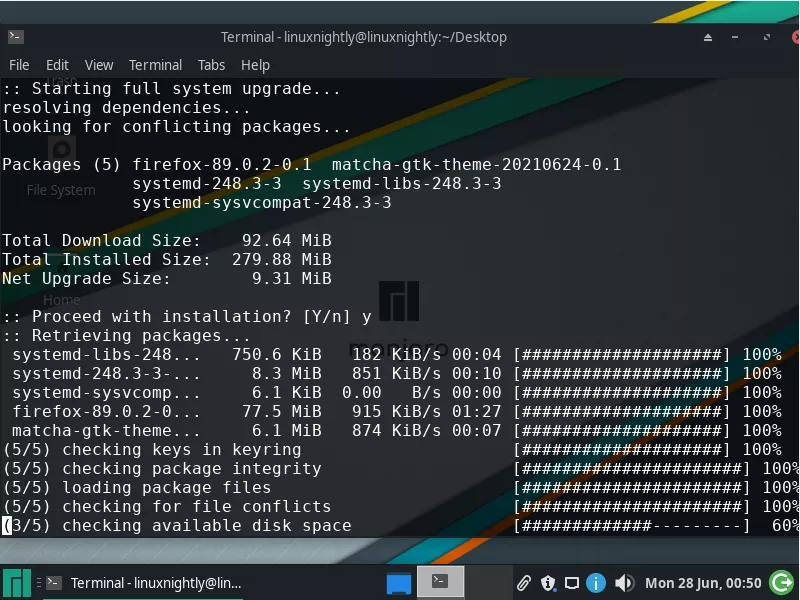
Your Manjaro Linux system is ready to go, and you can begin using it as normal. One of the first things you should do is update the entire system, so you are using all the latest packages and have all the recent bug fixes.
To do so, open a terminal and type the following command to completely upgrade Manjaro.
$ sudo pacman -Syyu
If you installed Manjaro as a virtual machine in VirtualBox, you should also install Guest Additions on Manjaro.
Enjoy your new Manjaro install. Leave a comment below if you ran into any problems.

