VirtualBox Guest Additions will help you get the most out of your Kali Linux virtual machine. It gives you automatic resolution scaling, a shared clipboard between the host and VM, and drag and drop ability. The step by step instructions below will explain how to install VirtualBox Guest Additions on Kali Linux.
Kali Linux will ordinarily install the Guest Additions software automatically, as long as it successfully detects that the operating system is installed inside VirtualBox. If you want to reinstall Guest Additions because it’s not working, or just upgrade to the latest version, the instructions below will also help you.
Install Guest Additions via apt Package Manager
VirtualBox Guest Additions can be installed from Kali’s official package repository. Follow the steps below to use this method to install the software.
Step 1. First, make sure your Kali Linux system is up to date. This will ensure that you have the latest kernel and can then install the appropriate version of the VirtualBox Guest Additions software.
$ sudo apt update
$ sudo apt full-upgrade
Step 2. Use the following command to install VirtualBox Guest Additions with the apt package manager.
$ sudo apt install virtualbox-guest-x11
Step 3. If you get a message saying that the package is already installed, but you want to reinstall it because it’s not working, use the --reinstall flag.
$ sudo apt install --reinstall virtualbox-guest-x11
Step 4. After the package is done installing, you’ll need to reboot the virtual machine for changes to take effect.
$ reboot
Step 5. You should now notice the automatic resolution scaling and other features being active. To verify succesful installation of the Guest Additions module, run the following command.
$ lsmod | grep vboxguest

vboxguest              49152  6 vboxsf
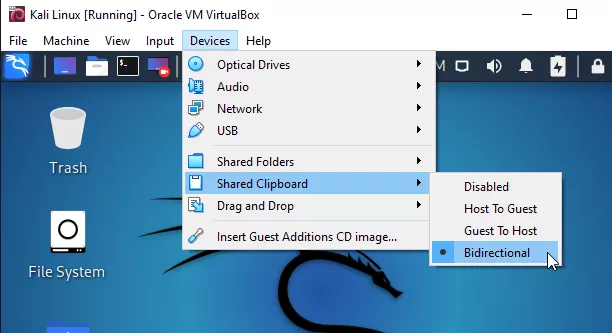
Step 6. Don’t forget that some features need to be enabled through the “Devices” menu before you can use them.
Install Guest Additions via CD Image
In case you would like to use the Guest Additions CD image to install the software, instead of from package manager, follow the steps below.
Step 1. First, we’ll use the system’s package manager to refresh package repositories, then install the prerequisite packages. Execute the following commands in terminal.
$ sudo apt update
$ sudo apt install linux-headers-$(uname -r) build-essential dkms
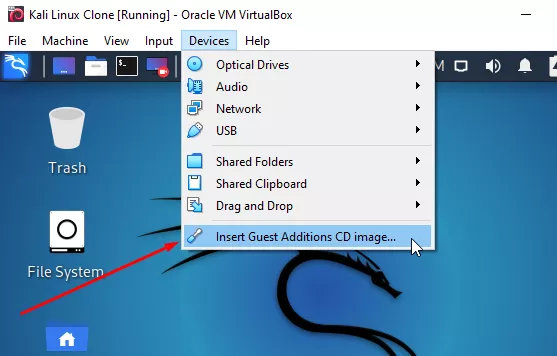
Step 2. Next, insert the Guest Additions CD into the VM by clicking on Devices > Insert Guest Additions CD Image.
Step 3. Make a new directory to which you can mount the Guest Additions CD. Then, mount the disc to that directory.
$ sudo mkdir -p /mnt/cdrom
$ sudo mount /dev/cdrom /mnt/cdrom
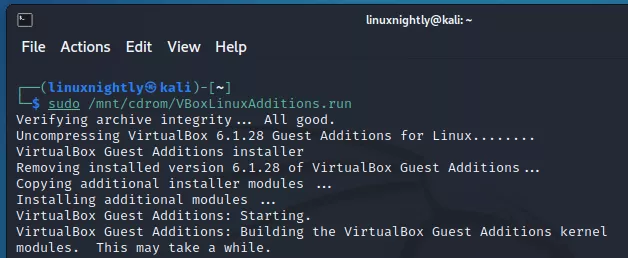
Step 4. Finally, execute the Guest Additions install script.
$ sudo /mnt/cdrom/VBoxLinuxAdditions.run
Step 5. That’s all there is to it, but you’ll need to reboot the virtual machine before you can enjoy the new benefits.
$ reboot
Step 6. You should now notice the automatic resolution scaling and other features being active. To verify succesful installation of the Guest Additions module, run the following command.
$ lsmod | grep vboxguest

vboxguest              49152  6 vboxsf
Step 7. Don’t forget that some features need to be enabled through the “Devices” menu before you can use them.