Manjaro has become popular among developers and programmers because of its speed, simplicity, and access to libraries and IDEs. In this tutorial, you will learn how to install Visual Studio Code on Manjaro Linux via command line and GUI.
Installing Visual Studio Code on Manjaro via Terminal
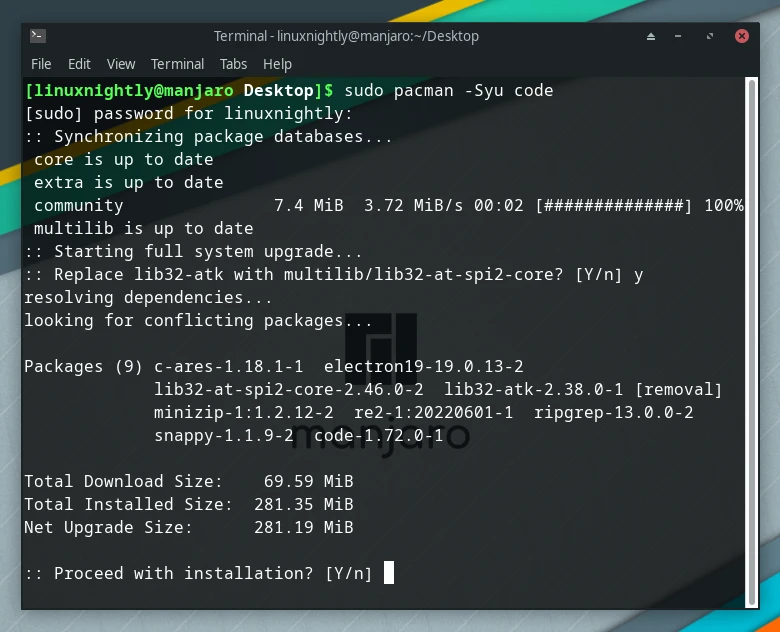
To install Visual Studio Code, use the following command.
$ sudo pacman -Syu code
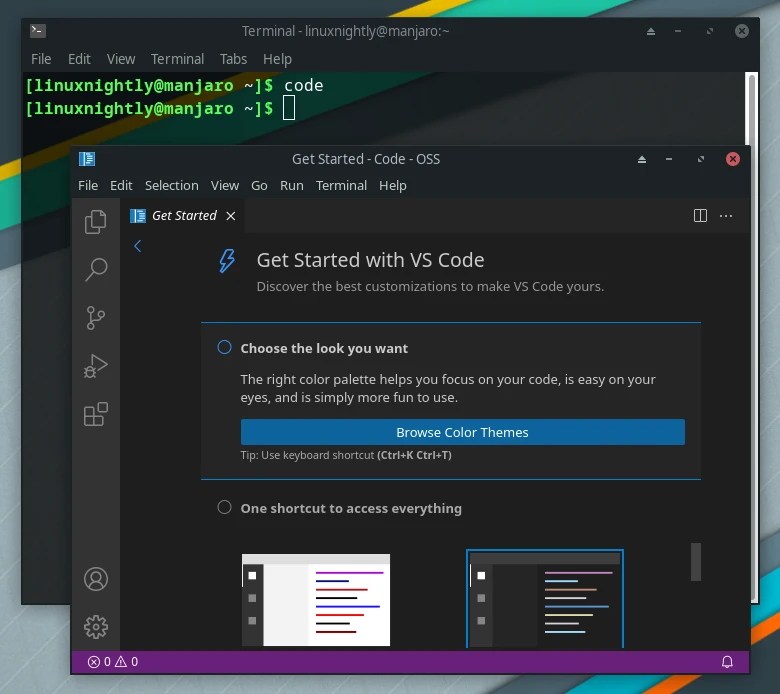
To open up Visual Studio Code through the terminal:
$ code
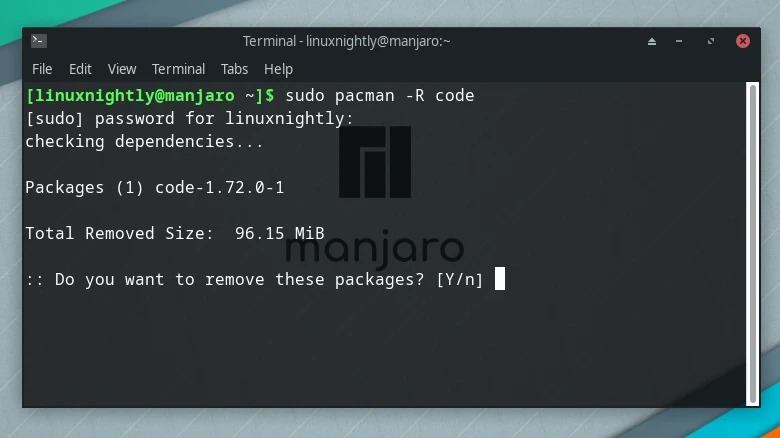
Uninstalling Visual Studio Code via Terminal
To remove VS Code from Manjaro, simply use the next command.
$ sudo pacman -R code
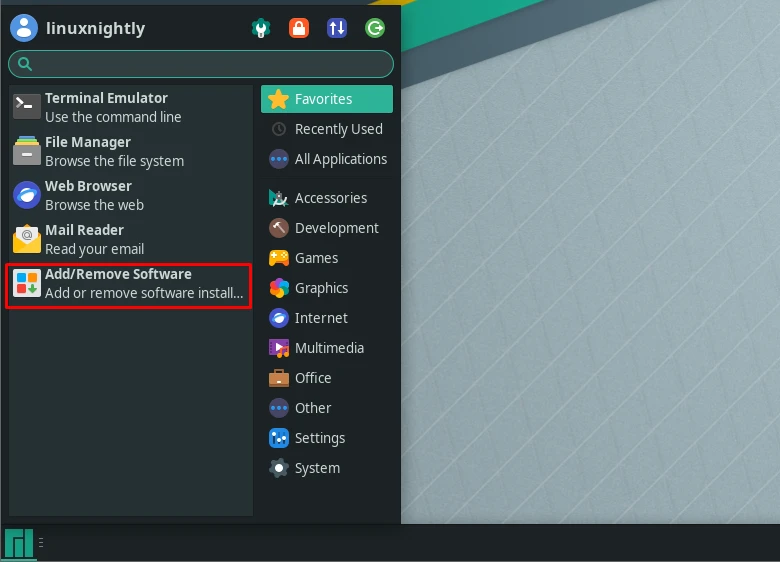
Installing Visual Studio Code via GUI
Step 1. Access Package Manager through the menu.
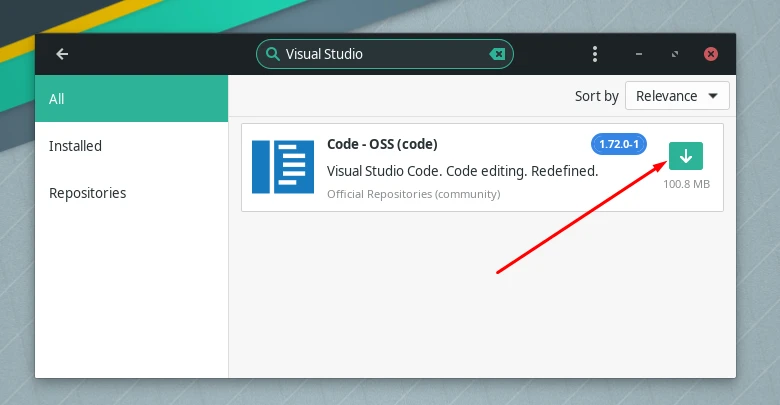
Step 2. Search for Visual Studio, then click the download icon next to it, to start downloading it.
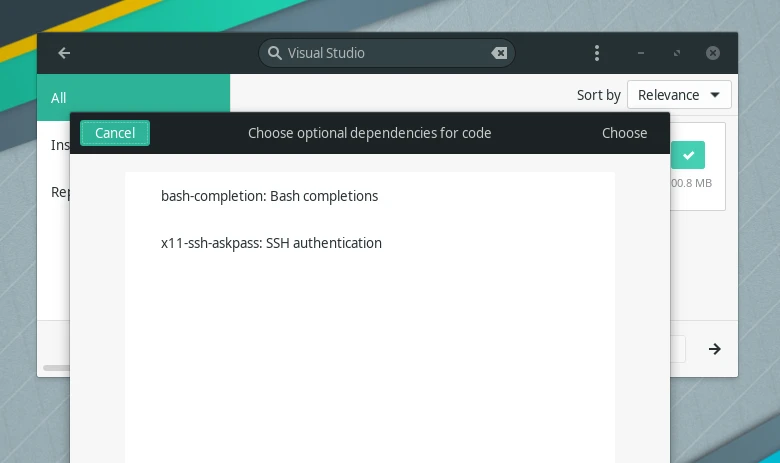
Step 3. You will see some prompts here and there, but just go through all of them, then finally you are all set and ready to use Visual Studio Code.
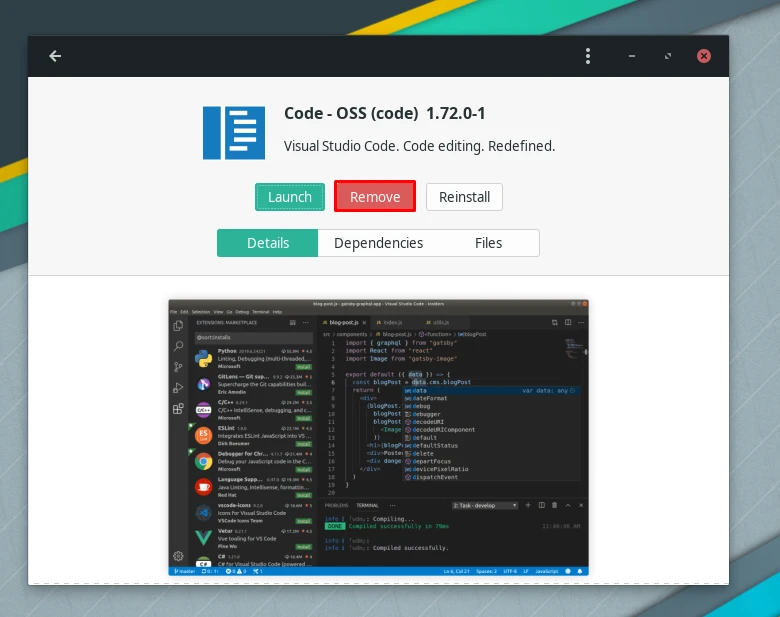
Step 4. In case you decide to uninstall later, simply click on Remove