You can access all your Windows PC’s files in WSL by mounting hard drives, flash drives, and other removable disks. In this guide, we’ll see how to mount our file systems in Windows Subsystem for Linux in order to access our files, as well as how to automate the process.
Accessing C: Drive
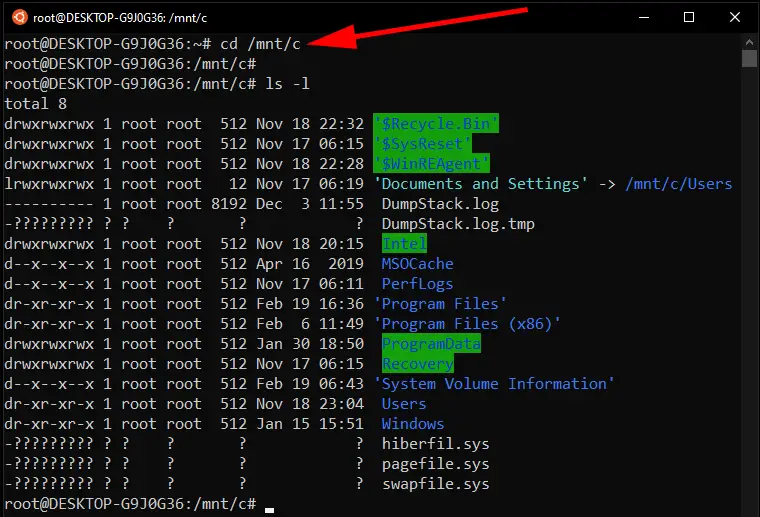
WSL will ordinarily mount your hard disks for you automatically in the /mnt directory. You can access the C: drive from under /mnt/c.
$ cd /mnt/c

Accessing secondary drives and removable media
To access other drives and removable media like flash drives, you can try the /mnt directory. So for your D: drive, you’d navigate to it in terminal with the following command.
$ cd /mnt/d
However, this doesn’t always work, as WSL may not mount these other drives automatically. In that case, we can mount them with the mount command. Run the following commands with sudo or the root user account. Remember to replace D: with whichever drive letter you’re trying to mount.
$ sudo mkdir /mnt/d
$ sudo mount -t drvfs D: /mnt/d
Of course, you don’t you have to use the /mnt directory. You can mount the drives wherever you like as long you use Microsoft’s DrvFs as the filesystem type in your mount command.
If you need to unmount a drive, you can use the normal umount Linux command.
$ sudo umount /mnt/d
Mount Drives Automatically
Rather than having to run mount commands every time you open WSL, we can mount the drives automatically and persistently by making some edits to the system’s /etc/fstab file. For example, adding the following line will automatically mount the D: drive.
D: /mnt/d drvfs defaults 0 0
It’s safe to ignore any default lines that are already in this file. Just make your changes to the bottom of the file.

Mounting in Read Only Mode
In case you’d like WSL to be able to read your files, but not make any changes to them, you can also mount a drive in read only mode by specifying the -o ro option in your command.
$ sudo mount -o ro -t drvfs D: /mnt/d
Mount Linux Filesystem in Windows
Drives formatted for Linux (i.e. ext4) can now be mounted in Windows 10 and Windows 11 with WSL.
Step 1. Open a PowerShell prompt with administrator permissions.
Step 2. Use this command to list the physical drives attached to your PC.
wmic diskdrive list brief
Step 3. Finally, mount the drive with the following command syntax.
wsl --mount [DeviceID] --[Partition #] -t [Filesystem]
Example:
wsl --mount \\.\PHYSICALDRIVE1 --partition 1 -t ext4
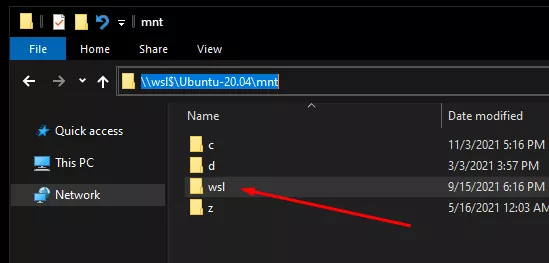
Step 4. Access the mounted drive in File Explorer, under \\wsl$.
For example, on my Ubuntu system, the path is:
\\wsl$\Ubuntu-20.04\mnt\wsl

Step 5. To unmount the drive, open PowerShell as administrator and execute:
wsl --unmount [DeviceID]
Example:
wsl --unmount \\.\PHYSICALDRIVE1
Access WSL Files in File Explorer
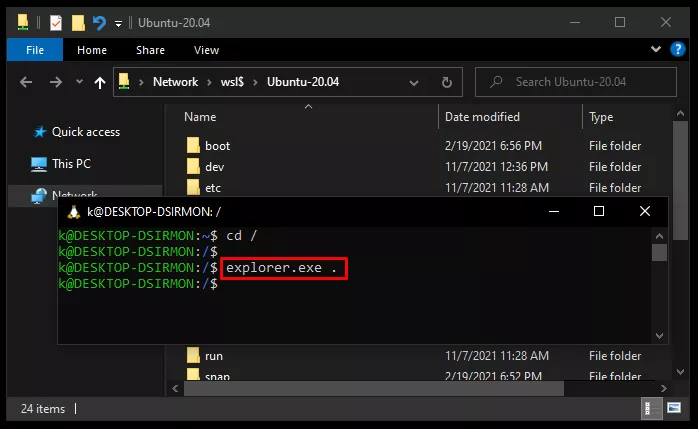
You can access your WSL files by navigating to \\wsl$ in File Explorer.
Alternatively, execute explorer.exe from within WSL to open the directory in File explorer.
$ explorer.exe .


Thank you this worked great. Mounted with no problems.
A few other articles that came up in Google search showed way more complicated instructions so I’m glad I found this one lol.
Thanks, works great for me in Ubuntu 22.04 under Windows 10.
Now how can I have it do the mount automatically at boot time? I’m already mounting the C: drive with an entry in /etc/fstab, can I add a line for this one too?
Thanks again
Yes, that’s right. Add a line in
/etc/fstabfor each drive that you want to mount automatically. You can also executesudo mount -aat any time to mount the entries in yourfstabfile.