To access the contents of an ISO file in Linux, you will need to mount it. In this tutorial, you will learn how to mount an ISO file using command line and GUI.
Mount ISO File via Command Line
Step 1. Create an empty directory where you would like to mount your ISO file, unless one already exists.
$ sudo mkdir /mnt/myisofile
Step 2. To mount your ISO file, use the mount command and the following syntax:
$ sudo mount ~/Downloads/file.iso /mnt/myisofile -o loop
The above command will mount file.iso to the /mnt/myisofile directory.
Step 3. Use the ls command to view the contents of your mounted ISO file:
$ ls -l /mnt/myisofile

You can now access the files inside of the ISO just like you would a normal directory in Linux.
Step 4. To unmount, simply use the unmount command and the directory path:
$ sudo umount /mnt/myisofile
Mount ISO File via GUI
Your desktop environment should include a way to mount the ISO file via GUI. Here we will show the instructions for GNOME on Ubuntu, though the instructions for other systems may vary.
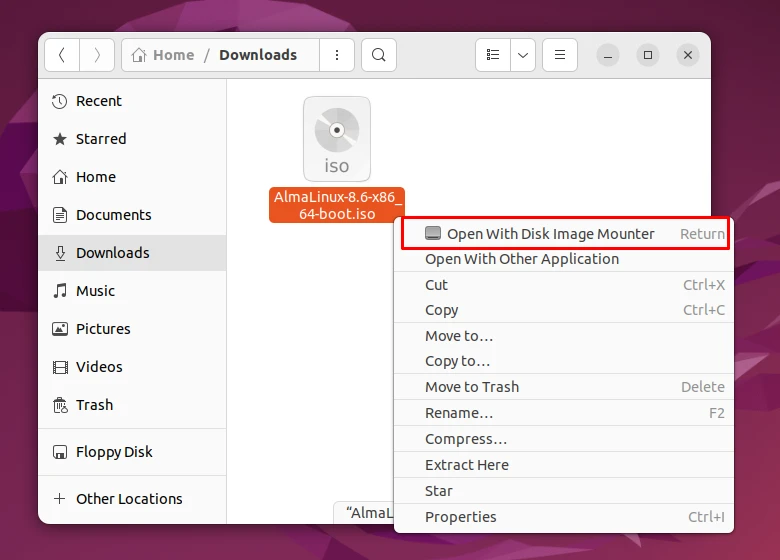
Step 1. Right click on your ISO file and then click on “Open With Disk Mounter”.
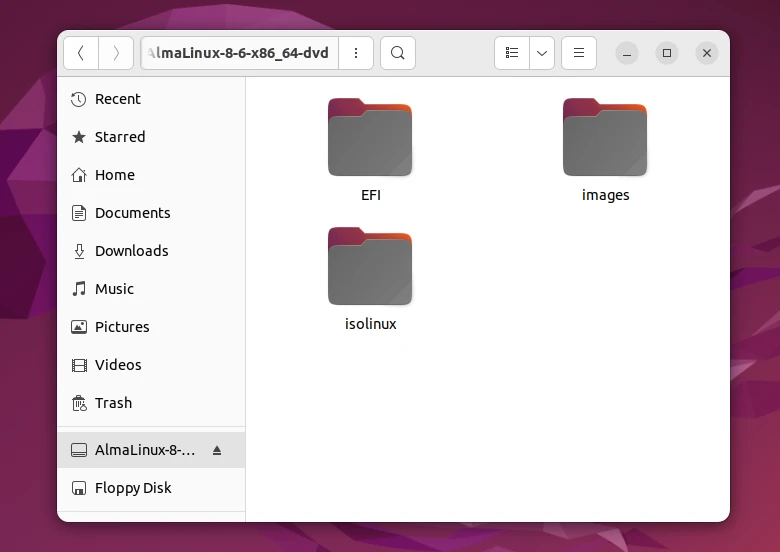
Step 2. Now you can navigate to the mounted ISO directory in your file browser.
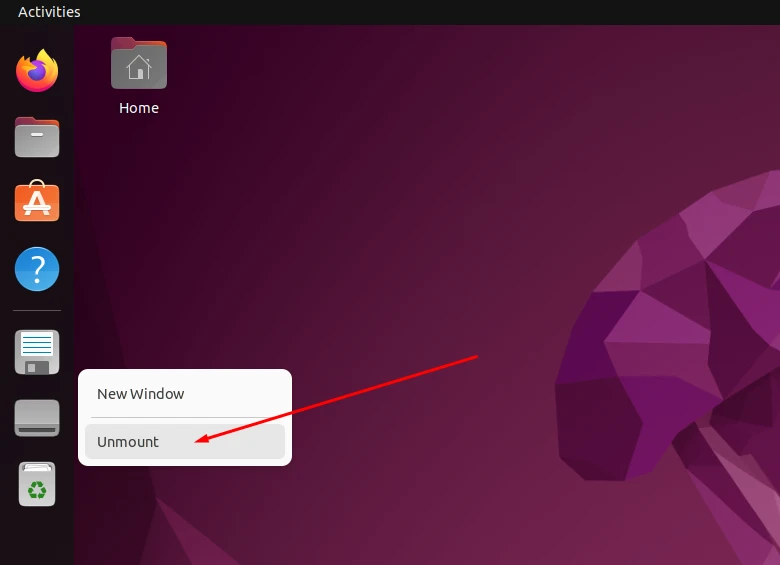
Step 4. To unmount it, simply click in the eject icon as shown below:
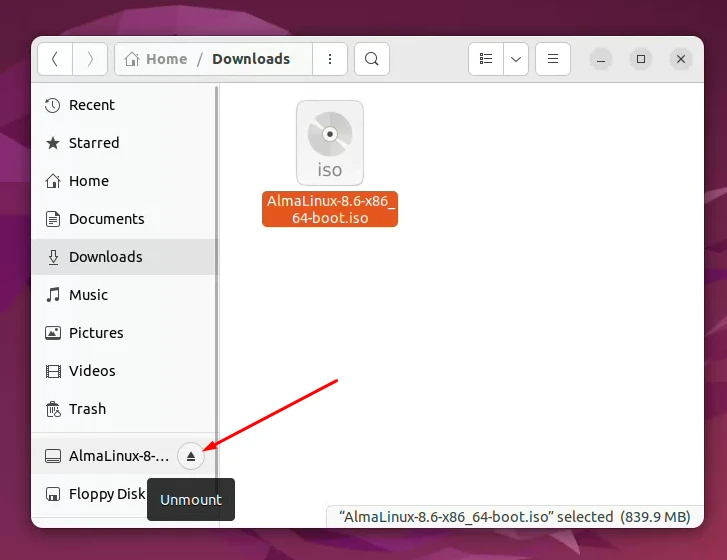
Step 5. You also can unmount the ISO file from your desktop: