
7-Zip is free software for compressing/decompressing files. Although you can already compress files by using the tar and zip commands, 7-Zip can outperform other compression technologies in terms of compression ratio, as shown in our benchmark tests for the best compression tool in Linux. 7-Zip can also encrypt your compressed archives with AES-256.
In this tutorial, you will see how to install 7-Zip on various Linux distributions and learn to use 7-Zip commands to perform compression and decompression of files and directories on the Linux command line.
How to Install 7-Zip
Use the appropriate command below to install 7-Zip with your Linux distro’s package manager.
Ubuntu, Debian, and Linux Mint:
$ sudo apt install p7zip-full
Fedora, AlmaLinux, Rocky Linux, Red Hat, CentOS:
$ sudo dnf install p7zip*
Arch Linux and Manjaro:
$ sudo pacman -S p7zip
Compress Files With 7-Zip
Now that 7-Zip is installed, let’s see how to compress some files.
Example 1. When you compress a file, you have to put a and an archive file name as follows. If an archive by the specified name doesn’t exist, it will be created.
$ 7z a my_archive.7z sample_file
Example 2. You can also compress a directory:
$ 7z a my_archive.7z /path/to/sample_files/
Example 3. Specify as many files or directories as you want, and they will all be compressed into the single archive.
$ 7z a my_archive.7z file1 file2 dir1/ dir2/
Example 4. There are various levels (0, 1, 3, 5, 7, 9) of compression that you can use with the -mx flag. A higher level will yield better compression ratio, but will also take longer to compress and decompress. The default level is 5. Level 0 means no compression, and level 9 means ultra compression.
$ 7z a -mx=7 my_archive.7z sample_file
The above command uses compression level 7.
Decompress Archives With 7-Zip
Example 1. When you want to decompress a 7-zip archive, use the x flag.
$ 7z x my_archive.7z
Example 2. If you want to designate the place where the decompressed files go, use the -o flag.
$ 7z x my_archive.7z -o /path/to/destination
Create Encrypted Archives With 7-Zip
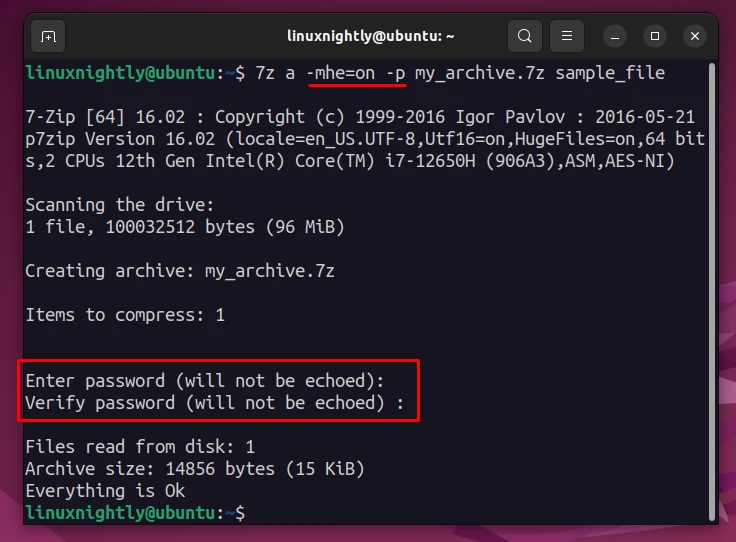
Example 1. 7-Zip uses AES-256 encryption by default. The -mhe option will turn on header and data encryption (highly recommended), and the -p option instructs 7-Zip to prompt us for a password to protect the archive with.
$ 7z a -mhe=on -p my_archive.7z sample_file
Example 2. The less recommended option is to specify the password in your 7-Zip command. Place it after the -p option, but don’t put a space.
$ 7z a -mhe=on -pmy_password my_archive.7z sample_file
Creating Backups With 7-Zip and Tar
7-Zip can be used to back up a directory, but should be used in conjunction with the tar command in order to preserve the owner and group data, and file permissions.
Example 1. We will use tar to create a backup, then compress it with 7-Zip. The -si option will read from standard input.
$ tar cf - directory | 7z a -si backup.tar.7z
Example 2. To decompress the backup, we will use 7-Zip’s -so option to send the data to standard output, then use tar to extract the files from the archive.
$ 7z x -so backup.tar.7z | tar xf -