NTFS (New Technology File System) was developed by Microsoft to store and retrieve files on storage devices. It’s the default file system for Windows systems, but we can also mount this type of file system in Linux in order to read and write data to the disk. In this tutorial, we will learn how to mount an NTFS partition with read-only permissions, along with read and write permissions.
Mounting NTFS Partition With Read and Write Permissions
Having read and write permissions allows us to not only view contents or read files, it also lets us create and modify them.
Before we proeed with the steps, we have to install ntfs-3g package on our system. Use the command below that corresponds with your Linux distribution:
$ sudo apt install ntfs-3g fuse # Ubuntu, Debian
$ sudo dnf install ntfs-3g fuse # Fedora, CentOS, AlmaLinux
$ sudo pacman -S ntfs-3g fuse # Arch Linux, Manjaro
To mount an NTFS partition with read and write permissions:
Step 1. To start mounting an NTFS partition, make sure to identify its path using the parted command:
$ sudo parted -l
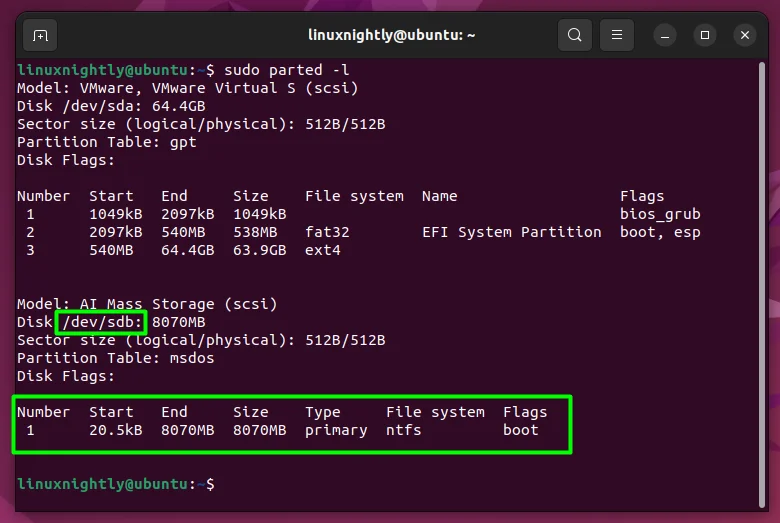
In the image above, we can see that the device directory is /dev/sdb, which contains only one NTFS partition. Therefore it will be accessible under /dev/sdb1.
Step 2. Create the mount path where you would like to access the drives contents. We will use /mnt/ntfs:
$ sudo mkdir -p /mnt/ntfs
Step 3. Now, proceed to mount the partition:
$ sudo mount -t ntfs /dev/sdb1 /mnt/ntfs
Step 4. Lastly, you can use mount command to verify the permissions.
$ mount | grep ntfs

The rw in the output above indicates read and write permissions.
Step 5. To unmount the NTFS partition, simply use the umount command:
$ sudo umount /mnt/ntfs
Mounting NTFS Partition With Read-Only Permissions
Read-only permissions allow you to open and read files, but you can’t edit them or delete them. This ensures that users won’t change any data on the partition, but they can still browse the files freely.
To mount an NTFS partition with read-only permissions, we will add the -o ro option to our mount command:
$ sudo mount -o ro -t ntfs /dev/sdb1 /mnt/ntfs
Note: In some cases, the system can have the read-only permission set by default. You can force this to read and write with the following command:
$ sudo mount -o rw -t ntfs /dev/sdb1 /mnt/ntfs
Set the NTFS Partition to Mount Automatically
We can also set the NTFS partition to mount automatically when the system boots by editing the file /etc/fstab file. This file contains important information about the mounting of our hard drive partitions in Linux.
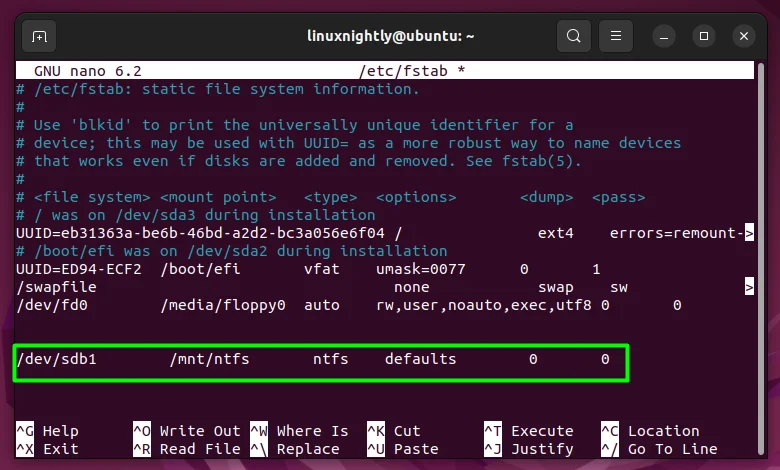
Step 1. Open up the file using a text editor of your choice:
$ sudo nano /etc/fstab
Step 2. Next, add the following entry. Remember to use the right mount path and device name:
/dev/sdb1 /mnt/ntfs ntfs defaults 0 0
Step 3. Finally, after adding the line, save and close the file, then execute the following mount command to mount all the partitions configured inside /etc/fstab:
$ sudo mount -a
