
AlmaLinux is an RHEL-based Linux distro that debuted in 2021 as a direct replacement to CentOS, which has now become CentOS Stream. It’s an enterprise-grade operating system that’s ideal for servers and production environments. Best of all, it’s free.
This guide will show the step by step instructions to install AlmaLinux. You can follow these steps whether you are installing AlmaLinux onto a physical computer or a virtual machine such as VirtualBox or VMware. If you are currently using CentOS, check our guide on migrating from CentOS to AlmaLinux.
Download AlmaLinux
Before starting, you’ll need to grab a free copy of the AlmaLinux installation media. You can download the ISO from the AlmaLinux download page, and you’ll be faced with three choices when doing so:
- dvd.iso – The biggest of the three files, packed with all the most common and popular software for AlmaLinux, including a desktop environment.
- minimal.iso – This image contains a minimal amount of software, and lacks a desktop environment. Additional software can still be downloaded.
- boot.iso – The smallest of the three files, this image only contains the AlmaLinux installer and the necessary basics. Everything else will need to be downloaded during installation.
Choose whichever image file best suits your needs. If in doubt, go for the AlmaLinux-dvd.iso image. Even if you plan on rolling out a minimal install, using the this image file doesn’t require you to install a GUI or any other software you don’t want. We’ll show you how to choose what software gets installed in the steps below.
Install AlmaLinux
Step 1. Insert the boot media into your computer or virtual machine and boot into the installer.
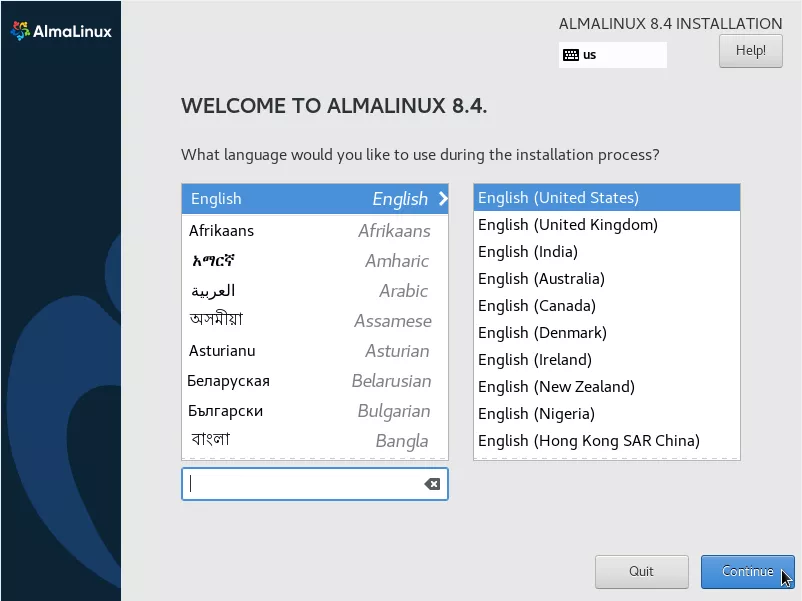
Step 2. Once the AlmaLinux installer loads, choose your language and click “Continue.”
Step 3. Click on the “Root Password” option to configure the password for your system’s root user.
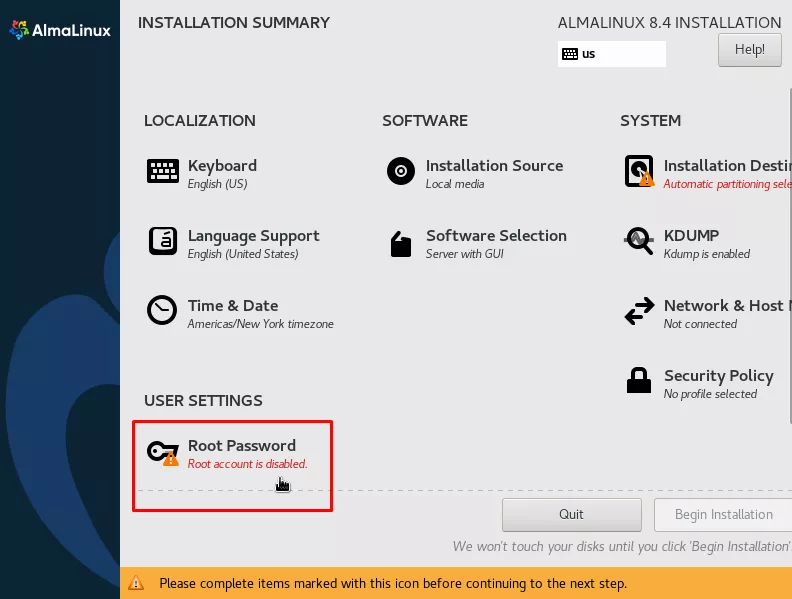
Step 4. Type a secure password two times, then click “Done.”

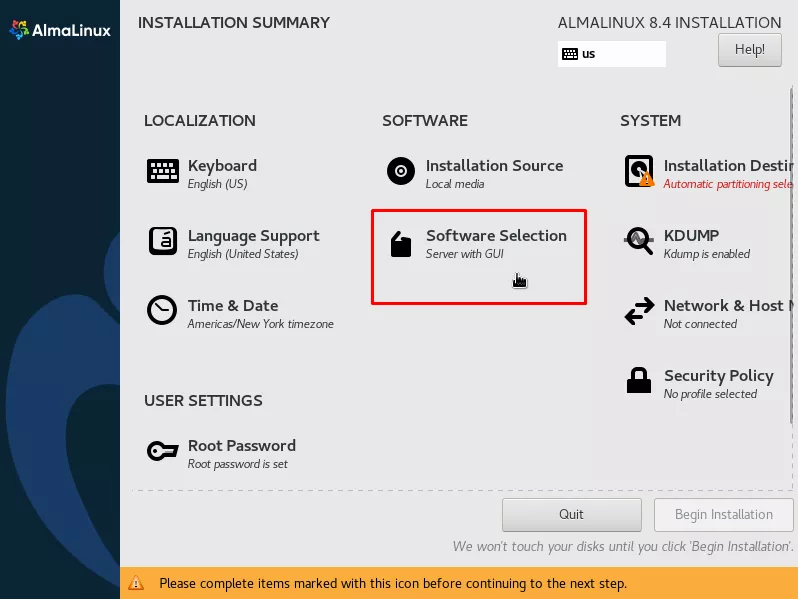
Step 5. Next, click on “Software Selection” to decide which software will be installed on your AlmaLinux system.
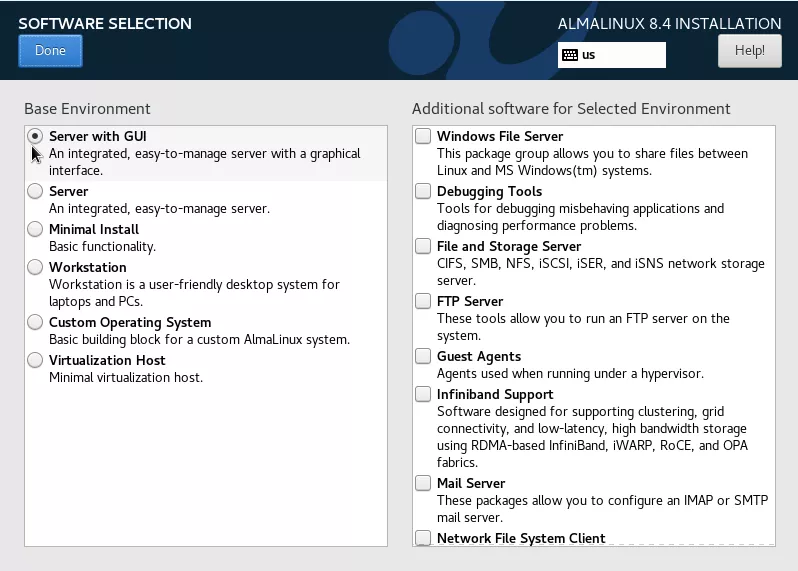
Step 6. Decide what type of base environment you’d like to have, as well as additional (and optional) software, if desired. The “Server with GUI” option will come with the GNOME desktop environment installed, and most other essential software that you’d expect to find on a server, such as OpenSSH. If you don’t want a GUI, then the “Server” option is a good choice. Otherwise, choose something else and then install what you need separately. Click “Done” afterwards.
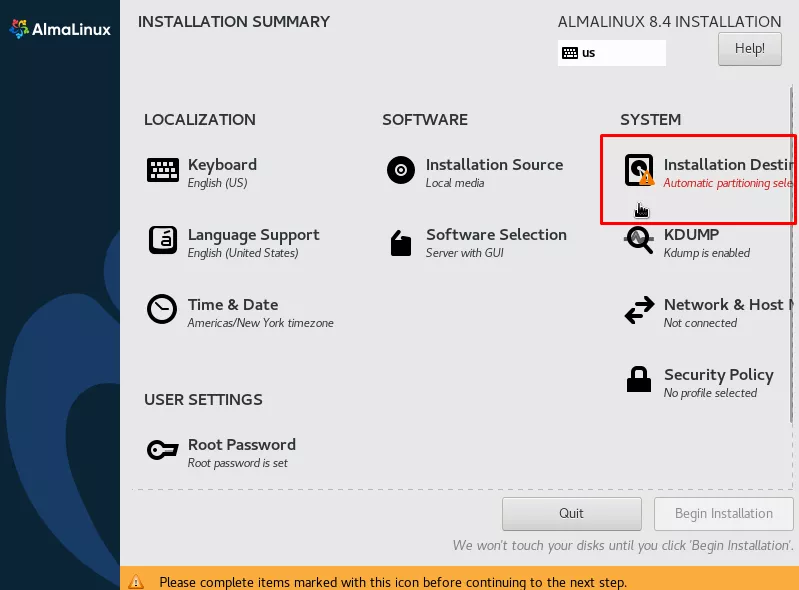
Step 7. Next, click on “Installation Destination” to configure disk partitioning.
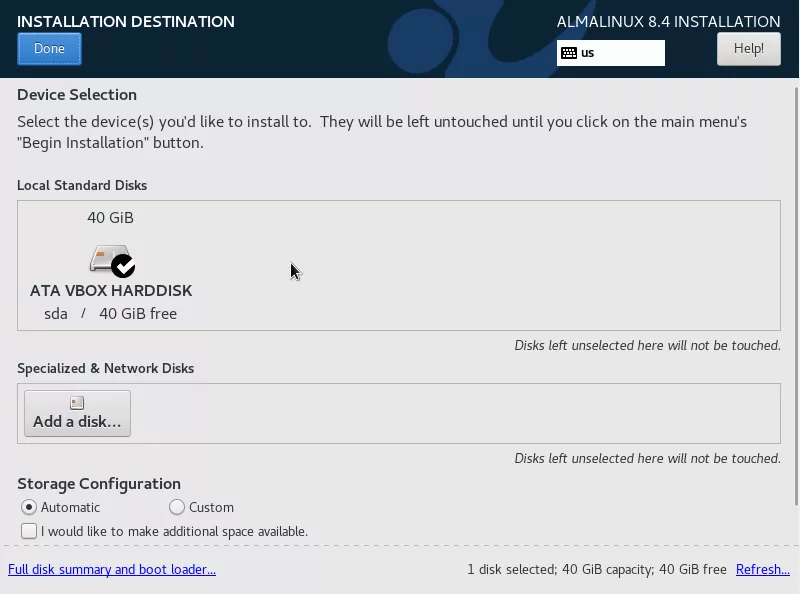
Step 8. To use automatic partitioning, simply click on “Done” to exit this menu. If you’d like to partition the disk manually, click on your disk and configure the partitions as desired.
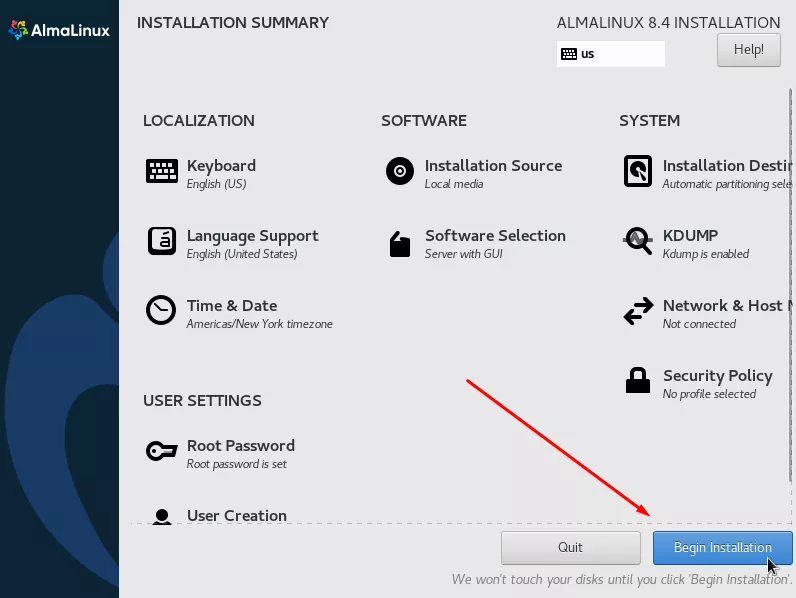
Step 9. We can now proceed with the installation process by clicking on “Begin Installation.”
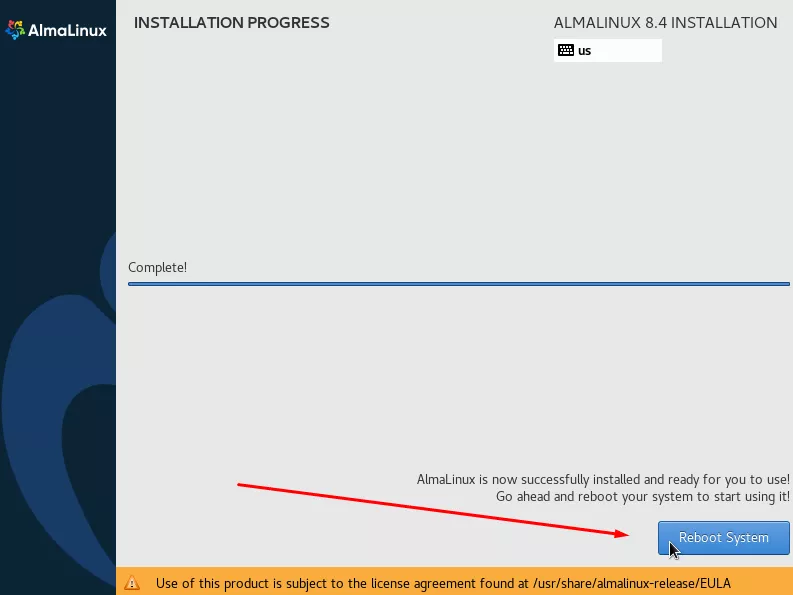
Step 10. Sit back and relax while AlmaLinux is being installed on your system. After a bit of waiting, installation will have finished and you can click the “Reboot System” button. Be sure to remove your installation media from the system so you don’t boot right back into the installer.
Step 11. If you chose to install a GUI, you’ll be asked to accept a license and (optionally) create a user, before being able to use the system.
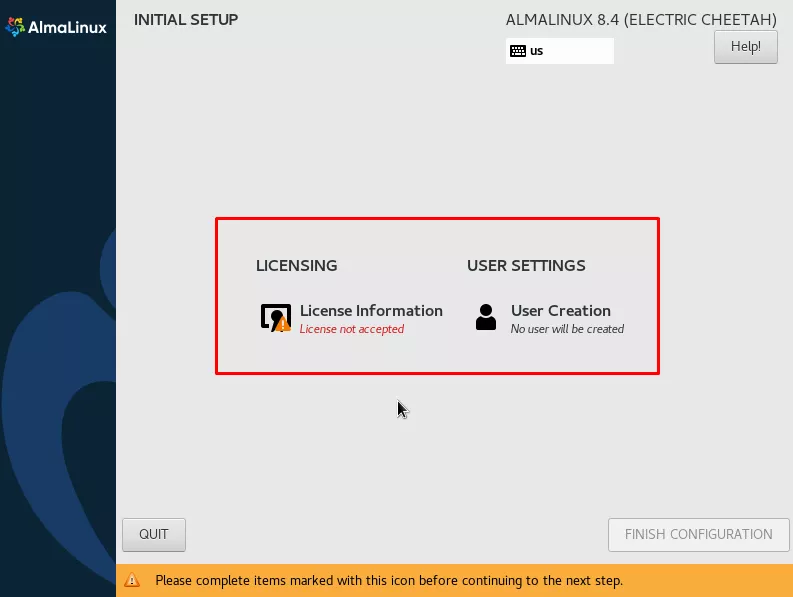
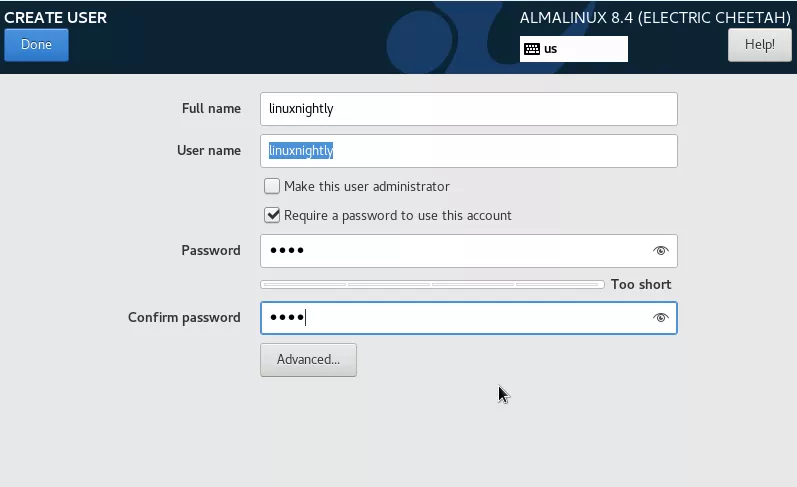
Step 12. In most cases, it’s recommended to create a user so you’re not always using the root account.
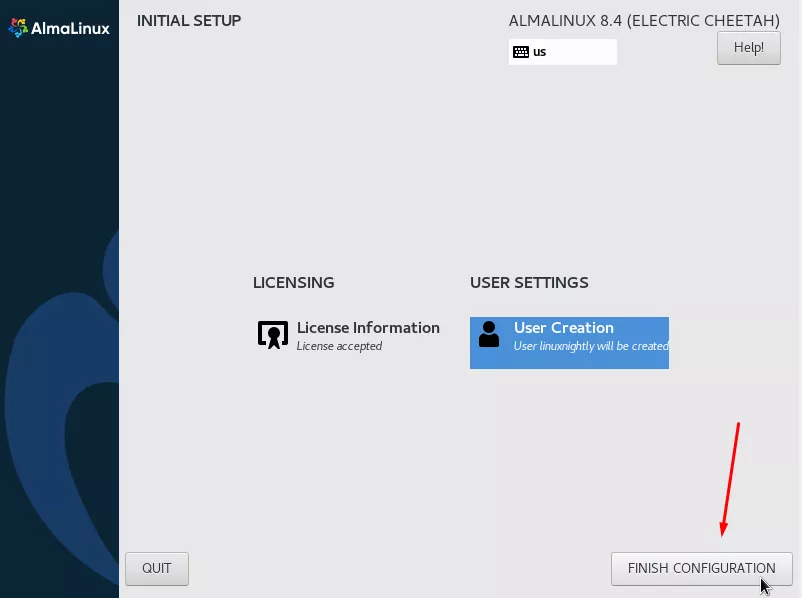
Step 13. Finally, click “Finish Configuration” and you can begin using your freshly installed AlmaLinux.
Wrapping Up
Your AlmaLinux system is ready to go, and you can begin using it as normal. You may find that you have no internet connection when first booting up. If that’s the case, try to retrieve an IP address via DHCP using the following command.
# dhclient -v
Keep your AlmaLinux system up to date by using the built-in DNF package manager.
# dnf update
If you didn’t elect to install a GUI earlier, but decide that you’d like to use one, you can install GNOME GUI on AlmaLinux with these commands:
# yum groupinstall "Server with GUI"
# systemctl set-default graphical.target
# reboot
And if you are using VirtualBox to run AlmaLinux, don’t forget to install VirtualBox Guest Additions. Or if you chose to run AlmaLinux in VMware, make sure you install VMware Tools.
